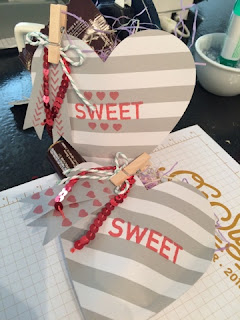
 This wonderful box was on the Stampin' Up! blog and created by Jessica Winter, Artisan Design Team 2015-2016 member. It is so unique and easy I knew we had to make it in the January Ladies Classes. The instructions, with pictures, for this box are below. You will be using the Gift Bag Punch Board for this project.
Supplies Needed:
- Gift Bag Punch Board
- 8.5"x3.25" Cardstock for the Bottom
- Score the long edge at 3/4"
- 3-9/16"x3-9/16" Designer Series Paper for the Top
- You will score this piece at 3/4" all the way around as shown in the picture
- Tear & Tape
- Bow Builder Punch, Sweetheart Punch, Itty Bitty Punch Pack
- Embellishments as Desired
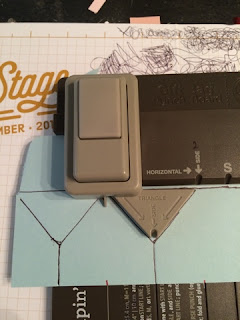
First you want to insert you 8.5"x3.25" piece of cardstock all the way into the Gift Bag Punch Board, making sure the left edge is aligned with the start line, punch, then score your "Martini Glass" and the top horizontal line. You will have to scoot your cardstock to the right to make the horizontal line go all the way to the left edge of your cardstock. With a pencil make a small tick mark at the lower edge of the cardstock on the "S" line.
Move your cardstock to the left, lining up the little tick mark with the start line. Repeat the step above, only this time you won't need to move your cardstock to the right to complete the horizontal line, just score the horizontal line along with making your "Martini Glass".
When you get done, your box bottom will be score and punched as show in the second picture below. The horizontal line at the bottom of the "Martini Glasses" is 3/4", score that using a paper trimmer fitted with a scoring blade or the Simply Scored Plate.

The "flaps" at the top of the cardstock strip are actually the box bottom flaps. To score you will fold your flaps with a "mountain" fold, the 3/4" top as a "valley" fold. The "Martini Glass" will be a "mountain" fold, gently fold the diagonal lines and the "stem" of the "Martini Glass" will just follow. Your instinct will be to fold the last 1/4" flap that holds the box together, don't. if you do than your fourth side will not be a flat fourth size but rather a weird 4th & 5th side and your lid won't fit properly. Ask me how I know.
Either before or after folding on all the lines, cut a couple of notches on the last 1/4", you can also add Tear & Tape.


Remove the protective paper from the Tear & Tape and adhere the tab on the inside of the box, lining up the points and creating a new "Martini Glass".
To put assemble the lid, score all four sides at 3/4" either with a Paper Trimmer fitted with a scoring blade or with the Simply Scored Plate. Cut notches on each of the four "squares" created from scoring. Fold on all the score lines and adhere the corners on the Inside of the rectangles, as to hide the tabs.

I hope that was helpful. Comment below if you have an questions.


No comments:
Post a Comment
Thank you for leaving a comment. I will review and publish your comment within 24 hours. If you choose to leave a comment anonymously without a name or email I will not publish it. If I am unable to successfully contact you in response to your comment, it will not be published.